My enclosure is primarily for a 6" sub, but the design/method could be adapted for a larger sub providing you can give it the required volume to work at its optimum (as per the manufacturer’s specs).
Whilst we are on the subject of enclosure volume, it’s important to find out what internal volume the manufacturer recommends for a sealed enclosure for your specific sub model. This will give you a good idea on how big the enclosure needs to be once you're done. (To get an accurate volume you may have to add the displacment volume of the sub itself).
Before we begin, I recommend to buy all the fibreglassing materials you will need for the job. I already had lots of fibreglass products left over from a previous project but I used the following materials and approx. quantities for the whole project:
3-4 square metres of 450gsm Fibreglass mat
3kg Polyester Resin plus hardener
Resin-resistant tape – http://www.cfsnet.co.uk/acatalog/CFS_Ca ... pe_91.html
Release-agent wax –
http://www.cfsnet.co.uk/acatalog/CFS_Ca ... ax_81.html
1 old cotton relatively stretchy t-shirt
Some 15mm thick MDF (15mm to match depth of sub ring in order to flush mount)
No-Nails
P38 bodyfiller
P40 Glassfibre Paste
‘Binding Post’ speaker wire connector –
http://www.caraudiodirect.co.uk/product ... ts_id=1279
Bit of old bumper-grill mesh
Masking tape
Binbags
Duck Tape
I recommend http://www.cfsnet.co.uk for your glassing supplies, esp if buying in bulk.
OK, now we are ready to start.
STEP 1 - REMOVE BINS
Remove the bins and side trim (ones with the vents in) from the car. It will be much easier to work outside of the car on a workbench in a nice warm garage than trying to mould the bins from inside the car! This way you can still drive the car on a daily basis, without becoming high from the FG fumes! (which incidentally can be a lot of fun but prob not best whilst driving lol)
I will not go into how to remove the afore-mentioned parts because this can be found in another section of the how-to forum.
STEP 2 - MODIFY BIN SHAPE FOR MOULDING
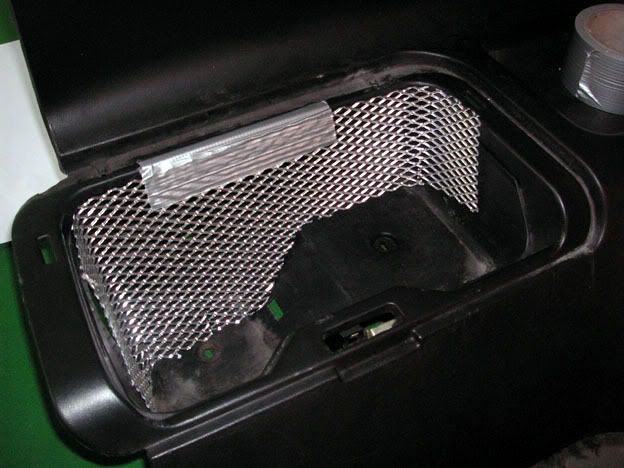
If we take a mould of the bin as it is, we won't be able to remove it as the bin shape restricts this. So we need to modify the actual shape of the mould we will take. I did this by making a quick template out of card and then cutting some mesh I had lying around to add a new 'back' to the bin as shown below. I did a similar thing to the left side of the bin and now once the mould has been taken of the shape that’s left, it will be easy to remove. Making the sides with a draft angle will facilitate this further. At this stage I also put a bit of mesh over the screw holes and secured firmly with Duck tape.
STEP 3 - PREPARE BIN FOR MOULDING
First off, I covered everything in masking tape followed by Duck tape, for a number of reasons - to fully secure the mesh to the bin, to smooth the mesh over and to protect the bin from the fibreglass. I used bin bags to cover the whole area around the moulding as this stuff tends to get EVERYWHERE lol. Photos below show just masking tape.

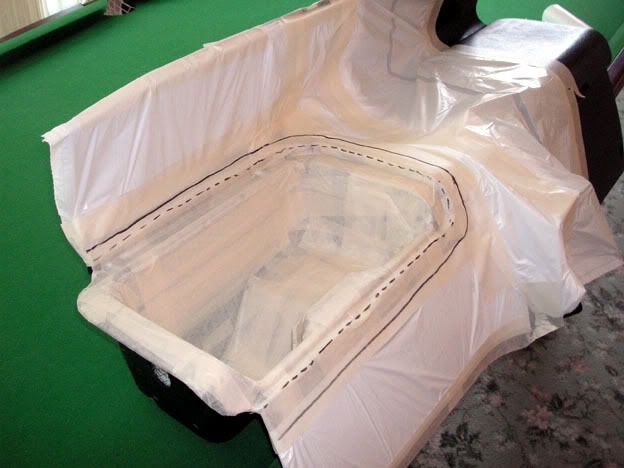
Next, I covered the whole lot in resin-resistant tape. I'd never used this stuff before but it works a treat. On top of this, I applied a wax release agent to ensure the mould would be easily separated from the bin once done.
STEP 4 - FIBREGLASSING
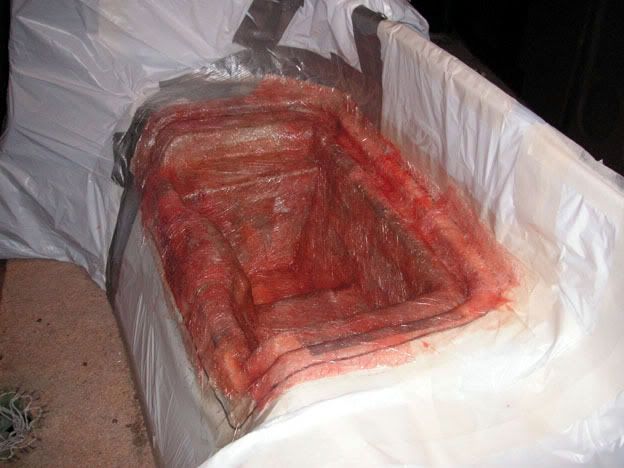
Here's the fun part! I applied only 2layers for now over everything in the bin, paying particular care and attention on the lips that run around the top of the bin and a further 2or 3layers over the larger flat areas. This would make the mould strong enough to pull out of the bin once cured without damaging it, as shown below.
I applied all the layers straight after each other as I find this 'interlinks' the layers better than leaving each layer to fully harden and is easier to push out any trapped air bubbles which weakens the mould. Others will have different ways of glassing, but it all comes down to personal experience at the end of the day. There are many tutorials out there explaining how to fibreglass so I won't go into them here.
Have a well deserved cup of tea and reassure your neighbours that the smell will soon dissappear, but will be making way for some healthy noise pollution instead lol. Leave to cure and fully harden for a day or two.
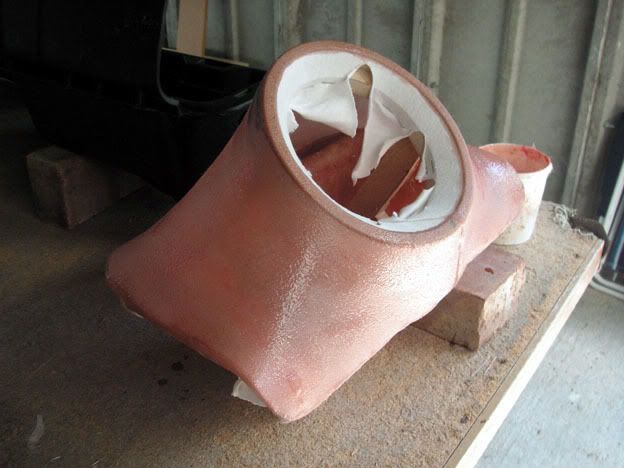
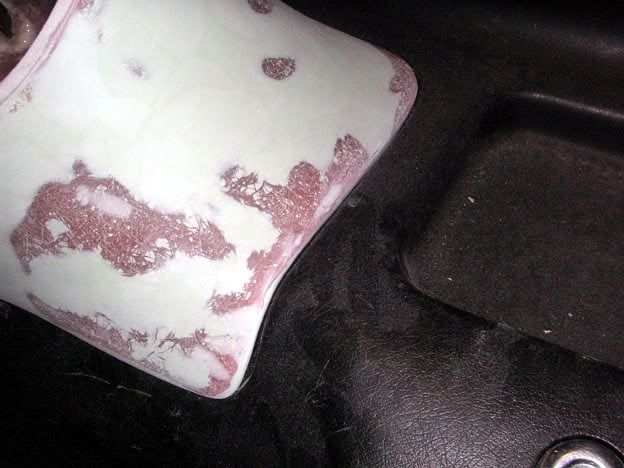
STEP 5 - REMOVE MOULD
Take your time with this, you can easily damage the top of the mould when prising it out of the bin. I found it quite easy after using the wax release agent and resin-resistant tape so you shouldn't have too much problem either. A little tip here tho- its even easier if you turn the bin upside down, and remove the base of the bin from the trim by undoing a few screws
STEP 6 - RE-INFORCE MOULD WITH MORE GLASS
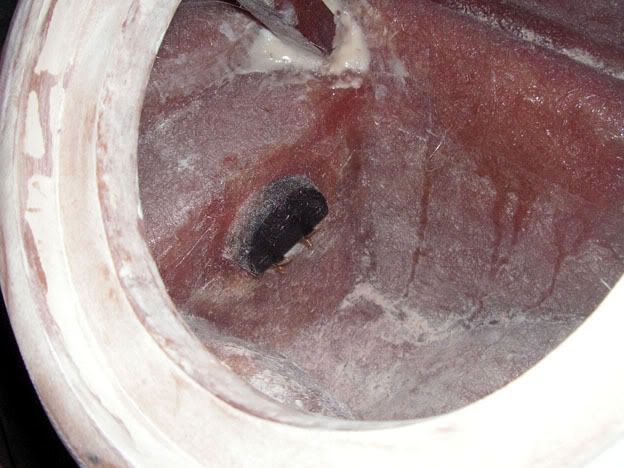
We previously applied only enough glass to get the mould out of the bin itself. We now need to beef-up the mould by applying more glass and resin. Add another few layers all over inside the mould - again with a few more on the flat areas which is the moulds weakest part, and will want to flex more when the bass hits. Its generally accepted that you want to achieve a minimum thickness of 6mm for optimum sound really in a fibreglass enclosure for a 6" sub, 8mm for an 8" etc.
Tip - don't apply any glass on the outside of the mould, as this will make it too big to sit in the bin!! Check the mould lies nicely in the bin once done.
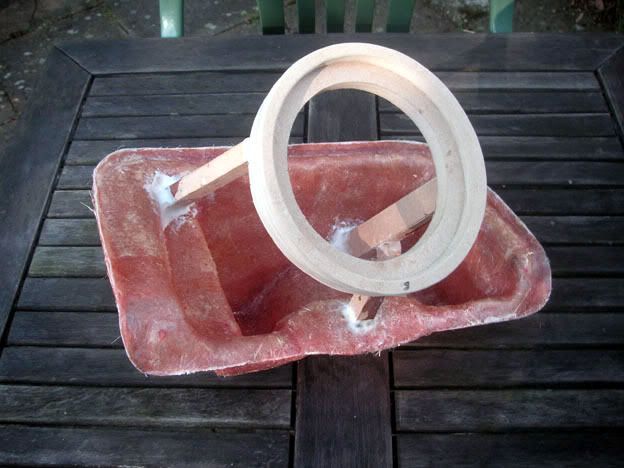
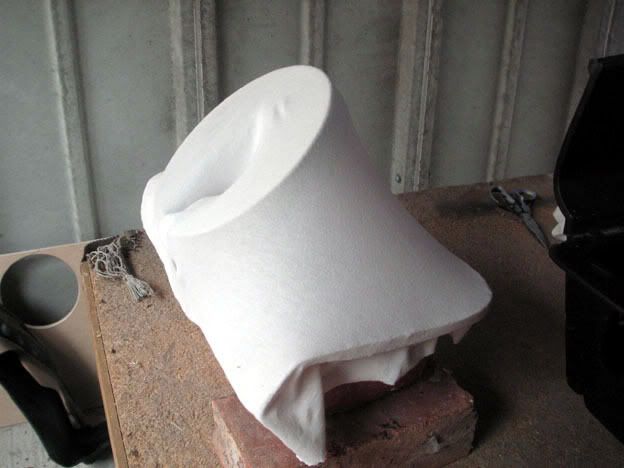
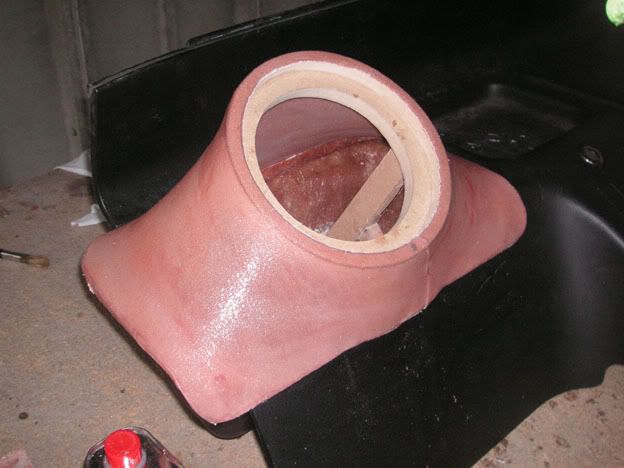
STEP 7 - MAKE AND MOUNT MDF SPEAKER RING
I decided to flush mount my sub, as I feel it is a lot more aesthetic than just mounting it on top. To do this, I cut two rings of MDF and bonded them together. There should be templates that came with your sub specifically for this but if not, just measure the outer and inner diameter of the sub ring and cut away.
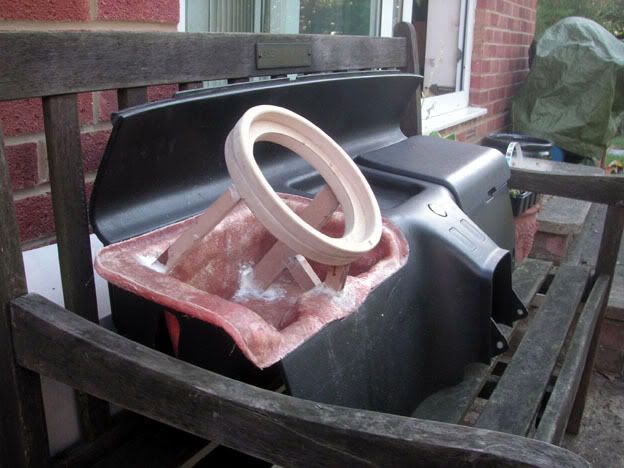
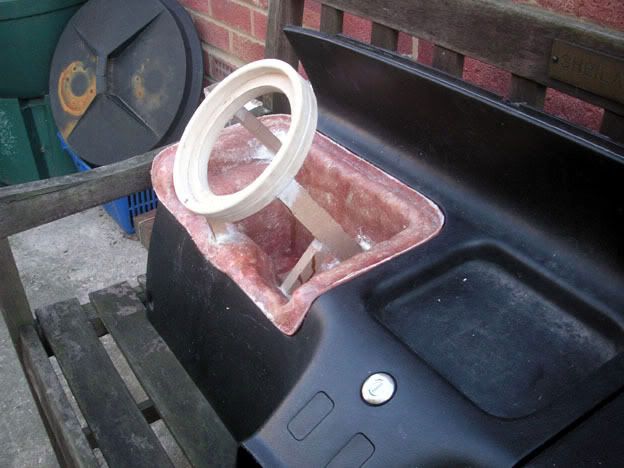
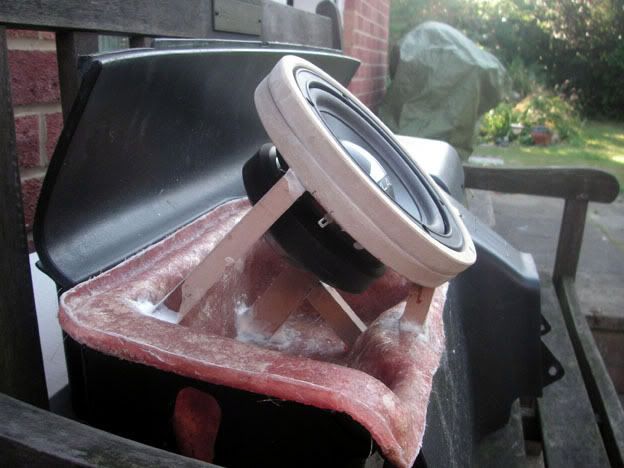
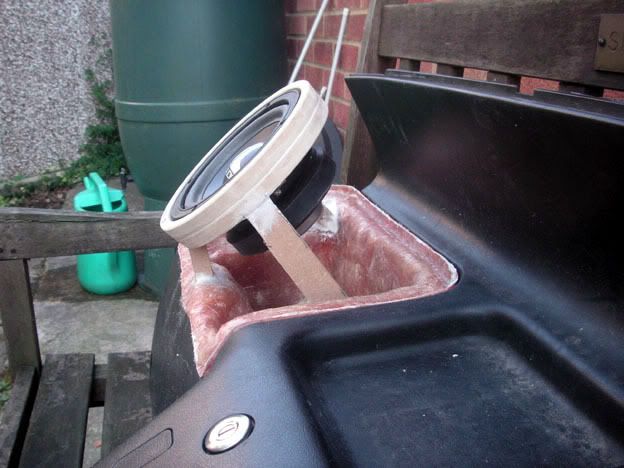
You then need to make up some wooden struts to support the mdf ring in your favoured position. It may be an idea to put the bins back in your car, place the mould in the bin and then find the best angle/position that you want your sub to sit at. This way you can take into consideration the seats when reclined etc. Another concern is how much volume you need ontop of the volume already provided by the base/mould - depending on your sub. I measured the volume of the base using water in a measuring jug, and then realised I needed approx double this to get near the total volume required so then estimated on the optimum position of the sub. I compromised a bit of my volume however to get the sub to sit in a more practical position behind the seats.
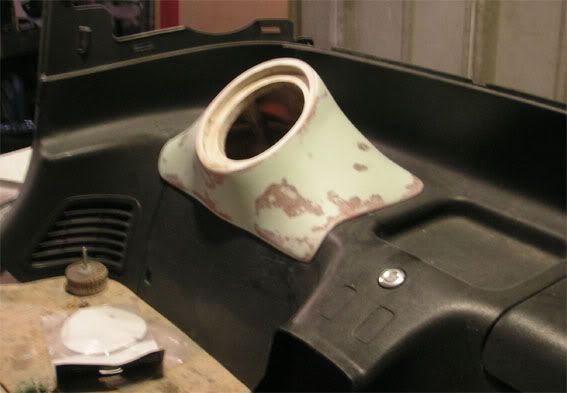
Once completed, your enclosure should be looking something like this;
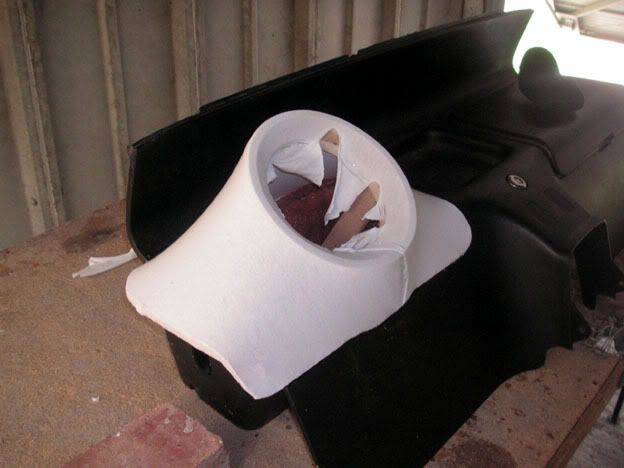
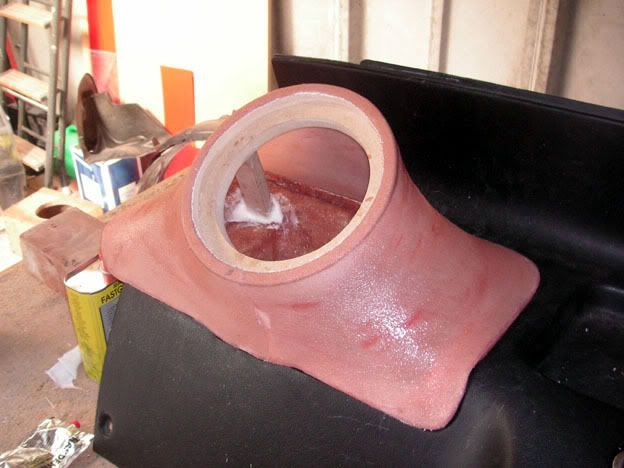
STEP 8 - SECURE SPEAKER CONNECTIONS
Measure the back of your connector ‘binding-post’ and drill a hole in the left side of the mould just big enough to push the connector through. I used a large hole saw drill bit to cut it in one go. Make sure you properly seal around the connector ON BOTH SIDES of the mould with more fibreglass to ensure no air can squeeze out as below;
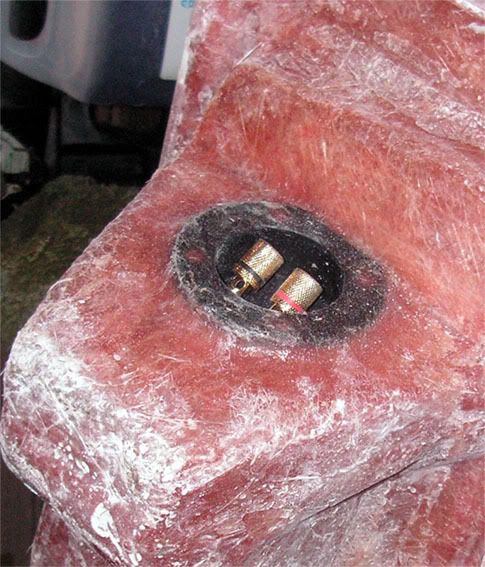
*As you can see in the pics I did this after step 7, but in hindsight it may have been easier to do it before mounting the sub ring for easier access to the back of the connector*
STEP 9 - STRETCH SOME CLOTH OVER FRAMEWORK
Now it's time to stretch your material over the framework. I opted for an old white, relatively thin when stretched cotten t-shirt - others use thicker fleece but all that does is make the enclosure much more heavy as it absorbs so much more resin, which incedentally does NOT add strength. I stapled the t-shirt to the sub ring, and used glue/tape etc. to secure it to the underside of the enclosure top rim. Try and get it as smooth and tight as poss as when you apply resin on it, it will tend to sag a little, and heavy ripples/creases in the shirt will show through even after glassing, all be it more disguised. I had to cut my t-shirt at the front of the enclosure to get rid of a load of excess material. Where you decide to cut is entirely up to you!
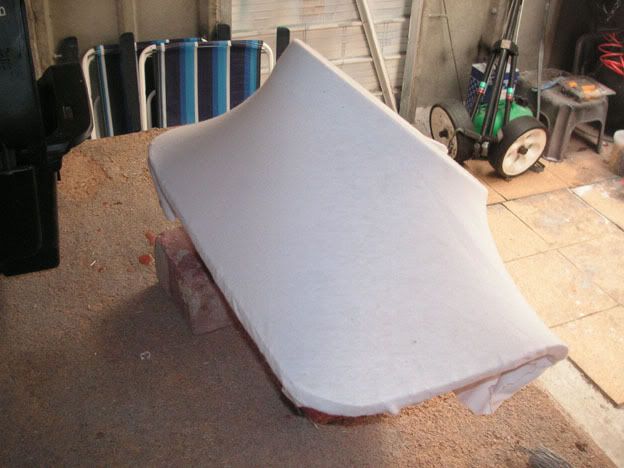
It's really starting to look like a sub enclosure now!!
STEP 10 - APPLY RESIN TO THE CLOTH
To make the cloth hard (oo-er), we need to apply resin (with hardener). Brush on the resin sparingly and evenly, don't just whack a load on. Having used a relatively thin t-shirt as opposed to a fleece material, it didn't take much resin. Leave to dry overnight.
STEP 11 - FIBREGLASS THE TOP OF THE ENCLOSURE
Using the now hard cloth as a base, build up with fibreglass to approx 6mm as before. Leave a couple of days to fully cure.
STEP 12 - SAND FIBREGLASS
Using a drill with sanding disc, sand the harden fibreglass down to a relatively even surface. Then start the laborious task of applying filler, sanding it down, re-applying filler, sanding it down - you see a trend here!!
Try and resist the temptation on using power tools to sand down the filler for the latter stages – you will get a much more ‘even’ and symmetrical look if you use some sandpaper and a block. Progress from a coarse grit (something like 60) down to around 400 for a really smooth finish.
Keep checking the fitment and how it looks in the bin every so often, especially when tidying the edges that butt up against the bin surround.
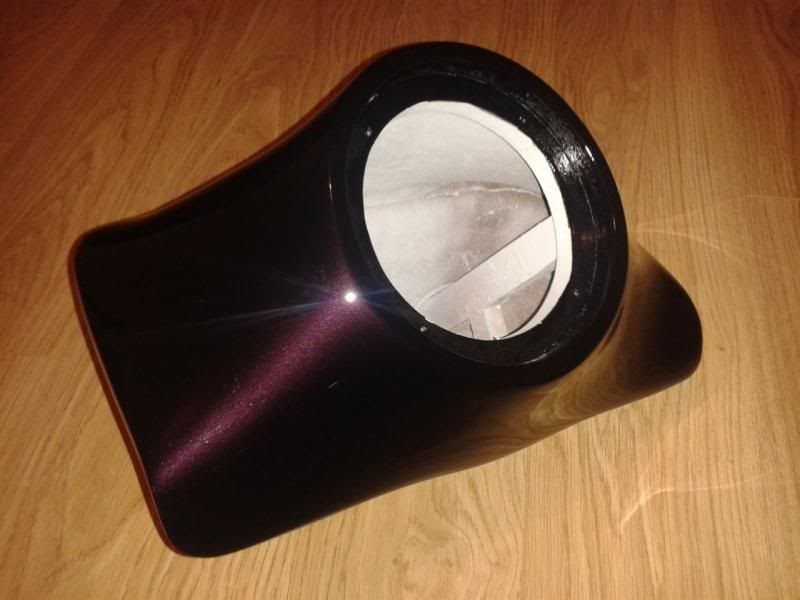
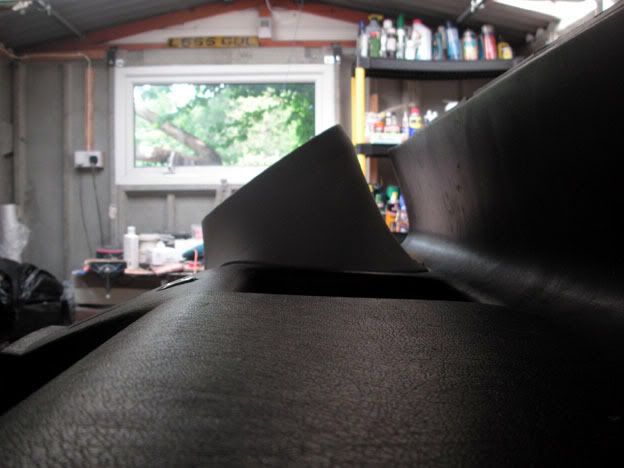
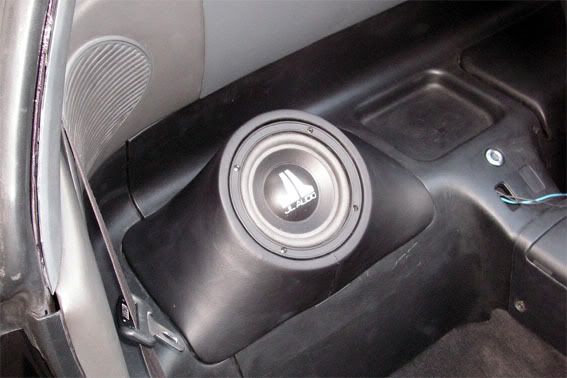
After all your hard work, you should have something like this;

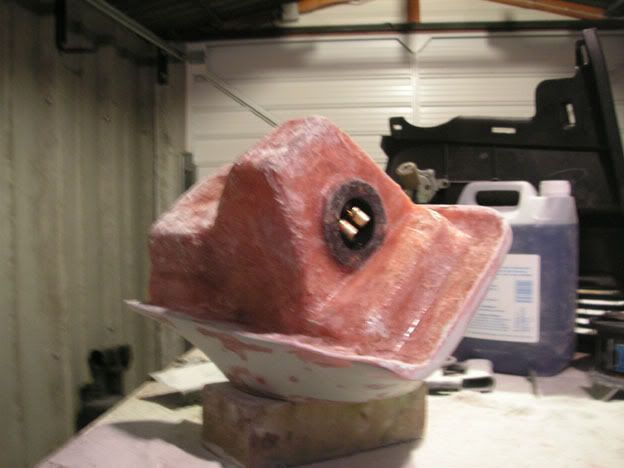
It is now ready for trimming, or painting. But remember, if you intend on spraying it, you will need a PERFERCT finish like bodywork or all the imperfections will ruin the look.
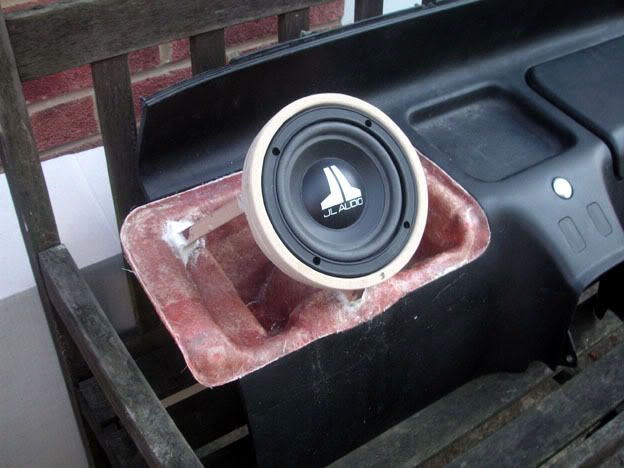
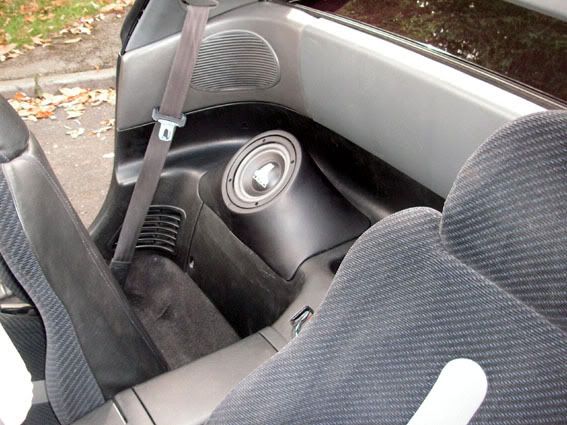
Replace all trim, wire the sub up and secure to MDF ring (don’t forget to drill pilot holes if using self tappers in MDF). Depending on how tight a fit your enclosure is, you may want to use Velcro in the bin to secure the enclosure more.
Et Voila – the finished article, sit back and enjoy the pumpin beats!
Thanks for reading,
Chris
*disclaimer - I hold NO repsonsibility for any damage/monkey ups lol - do this at your own risk
*there is always going to be different ways of doing things like this, this was MY way so don't treat this as a 'must' way of doing things also
*and make sure you set the sub/amp up correctly to get the best sound from your enclosure
peace out